A microscope is simply a tool and, as with most tools, it requires different techniques for different jobs. In fact, there is a bewildering amount of different techniques for isolating various pathogens. This will become clearer as you learn a few tests for your pigeons.
The first test you should do is for coccidia. A word about coccidia—it’s an organism that invades its host as a community. It’s considered a parasite even though it doesn’t assume the form of a multi-celled organism like a roundworm. Virtually all pigeons are infected with these things (actually, different species of them infect most animals on earth and you can use this technique on all of them—you can even check yourself and other family members!).
You can never completely clear a pigeon of them, but you can control it. Most of the time, a pigeon lives with it in something like a “dormant phase” and it doesn’t bother them at all. It’s only when they get stressed, sick with something else or have ingested too many of the oocysts (the “eggs” that you’ll be looking for in your microscope) that the infection turns into a life-threatening disease.
I’d have to say that the majority of pigeons that I get that need medical help are dying of coccidiosis. And most of those are young pigeons that are having a hard time learning how to properly forage for food. They start starving and eating dirtier stuff and get REALLY sick.
The things that you’re going to need for this simple test are your microscope, slides, coverslips, some kind of really small vial, a small bottle of saturated saltwater, a Q-Tip (toothpick, wooden matchstick, whatever) and a pretty good sized eye-dropper.
Some of this stuff could use some explanation:
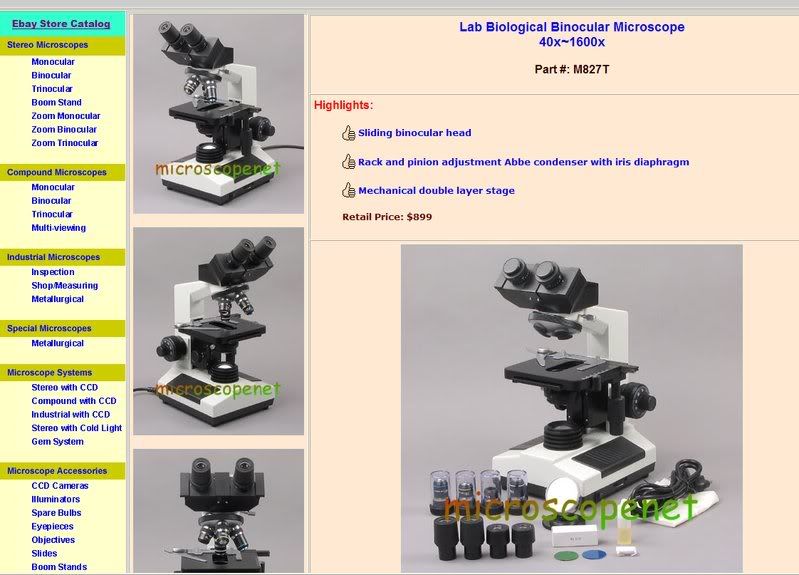
MICROSCOPE: A good lab-quality microscope is NOT going to come cheap (not easily, anyway). I got a 30 year-old scope for US $275 that only has three objectives but is binocular (two eyepieces) and that was actually a pretty good deal. You don’t need a binocular scope but they sure are easier on the eyes (unless you only have one) if you’re going to spend hours doing it. It’s when you spend a LONG time examining things because you don’t know what they are that you REALLY start getting eyestrain.
I did look through a kid’s microscope to see if I could see the coccidia oocysts through it and I could. They weren’t as sharp, but you CAN identify them. Remember, it’s a tool—you’re trying to save the life of a pigeon so if it’s all you can afford and it works… it’s good enough. Now, a cat, of course, would rather die than be diagnosed with inferior equipment so don’t bother. (Oh, come on! I was just joking! Don’t call the SPCA!!! I’m making out a check right now…)
COVERSLIPS: The little squares of flat glass or plastic that are used to cover the samples on some slide preparations. They come in different sizes as well as different thicknesses. A “No. 0” size is generally used if you’re going to be using the 1000x oil immersion combination (10x eyepiece X 100x objective lens) because a No. 1 size is thick enough that the lens might adjust right down on it and break it as well as do possible harm to the microscope’s adjustment gears (depends on the scope).
If you don’t have coverslips for this test, then you’re going to have to check to see that your microscope focuses with enough clearance above a two-slide stack in the 100x configuration. That is, you’re going to use either a full slide or a broken piece of a slide (disclaimer: author not FINANCIALLY responsible for anyone cutting themselves with a broken slide) and put a hair in between the slides. Put the stack in the microscope with the lens adjusted up out of the way, center the hair where it should be visible through the smallest magnification lens and then begin to focus carefully until you can see it plainly. If your smallest lens is a 4x objective, then rotate the 10x objective into place and make sure it doesn’t hit the doubled slide. Refocus carefully. If that won’t work, get some real coverslips for this online through a scientific supply retailer or at an educational/scientific/laboratory store in a location near you.
VIAL: Think of a vial as a real small test tube. The vials that I use are from a commercial lab supply but you don’t need anything that difficult to come by. It’s best if they’re pretty small—mine are glass and hold slightly less than one teaspoon. They’re about 3/8” in diameter, 1-1/4” tall and flat bottomed. Another thing that could work is one of those plastic boutonniere water-holding thingies. I think they come on corsages as well. Everybody has one of those laying around, right? If you can’t find anything in the house that’ll work, you’re going to have to search the drugstore until you find something that will. I just tried looking through the house for a suitable replacement and the only thing that I came up with was half of a ballpoint pen or pen cap. You can’t see through them, but they’d work in a pinch. If it’s a tapered pen half with a hole in the bottom for the point to stick through, you’re going to need to make a base and seal the hole. I’d use fresh-chewed gum stuck to the tapered end with a piece of paper on bottom to keep it from sticking to anything else.
Uh… the idea here is to get achievable results RIGHT NOW instead of languishing in the throes of defeat because you’ve got to go shopping in some other city or online and wait for days, weeks or months for results. That’s why you CAN substitute for decent equipment here. After all, you’re looking at poop, not performing rocket science. The rocket scientists made the microscope and you’ve ALREADY bought that.
This test is called a “float.” They call it that because you’re going to put a fecal sample in some saltwater and float the parasites to the top. They float for the same reason you would in the Great Salt Lake in Utah—you’re lighter than the water. Worm eggs, coccidia oocysts and some other things tend to float right out of the poop when the saltwater solution is “saturated.” Pictures illustrating this procedure (verbally detailed below) may be accessed at this link:
http://community.webshots.com/album/390838288PpihBy
Step 1—prepare your saltwater. Use a small, clean (clear is best) bottle (don’t make a big batch—1/4 cup is more than enough) and fill half-full (half-empty if you’re a pessimist) with water. Start adding regular table salt by the teaspoon and shaking each time you add until you finally get to where the salt stops dissolving in the water. Add water slowly if you’ve way oversalted until most of it can dissolve when shaken.
Step 2—Grab a sample of the solids (sometimes, it’s hard to find solids in a REAL sick pigeon’s poop—just do your best). Often, the pigeon hasn’t had anything to eat before you got it and all that’s coming out the vent is water, acid and dark green bile. Either you’re going to have to stuff some food down the pigeon to get a sample (which is going to take awhile), or you’re going to have to use these liquids for your sample. Or both.
Step 3—Load the poop in the vial. You’d like to get the vial about half full (it takes a REAL pessimist to call half of a vial of poop “half empty”) or less of solid poop. Actually, you can do the test with a very minimal sample. Both worm eggs and coccidial oocysts will float up if they're present in the feces. Sometimes, there is mostly water and very little solids and you just have to scoop up what you can.
Step 4--Fill it part way with the saltwater using the eyedropper (spoon, whatever works). Use a Q-tip (fresh match, toothpick, whatever--just be sure it's clean) to reach in and mix the poop and saltwater thoroughly. Add saltwater until not quite full with your mixing instrument as far in it as you’re going to put it.
Step 5—Carefully place the vial straight upright on something out of the way and drop enough drops of the saltwater to top off the vial until the liquid beads up slightly out of the top.
Step 6—Center a coverslip (slide, shard) on top of the bead of liquid and leave it lay for about 30 minutes.
Step 7—Pick the coverslip (slide, shard) off carefully and lay it on the center of a clean slide.
Step 8—Examine the slide at 100x for parasites. That’s using the 10x eyepiece (if that’s what you have) with a 10x objective (the part that’s almost right down on the slide).
Step 9—Know both what you’re looking at and what you’re looking for! Usually, most of the solids sink to the bottom but you’re likely to see a few plant cell parts from the food the donor has eaten. Bubbles will look funny, like little black, shiny globes. There can be a million kinds of things—feather parts, fibers from a Q-Tip, dust, lint, litter from Piccadilly Circus (had to throw that one in for Cynthia!) but hopefully no OOCYSTS OR WORM EGGS!!!
Of course, since you’ve come this far, it would be a shame not to find a parasite egg, wouldn’t it?
SHAME ON YOU!!! THIS PIGEON WASN’T HATCHED TO SUFFER DISEASES FOR YOUR ENTERTAINMENT!!!
Still, you hate to spend all that money for this equipment and time to learn to use it and have nothing to show for it.
Okay, so now we have to go shopping for microscope images of what you're looking for. Here's one that shows close-ups of the single oocysts. When you're looking with 100x magnification, they're going to be a lot smaller than this. I'll try to find a more realistic picture link and post it in a follow-up:
http://pets.webshots.com/photo/1390863736073664377NBbQUV
Here is a link to pictures taken of a typical Coccidiosis fecal sample before processing and through the microscope:
http://community.webshots.com/album/388039642jvhcQW
Here's a link to Vonda's page covering similar material:
http://www.finchaviary.com/Maintenance/FecalSmear.htm
The first test you should do is for coccidia. A word about coccidia—it’s an organism that invades its host as a community. It’s considered a parasite even though it doesn’t assume the form of a multi-celled organism like a roundworm. Virtually all pigeons are infected with these things (actually, different species of them infect most animals on earth and you can use this technique on all of them—you can even check yourself and other family members!).
You can never completely clear a pigeon of them, but you can control it. Most of the time, a pigeon lives with it in something like a “dormant phase” and it doesn’t bother them at all. It’s only when they get stressed, sick with something else or have ingested too many of the oocysts (the “eggs” that you’ll be looking for in your microscope) that the infection turns into a life-threatening disease.
I’d have to say that the majority of pigeons that I get that need medical help are dying of coccidiosis. And most of those are young pigeons that are having a hard time learning how to properly forage for food. They start starving and eating dirtier stuff and get REALLY sick.
The things that you’re going to need for this simple test are your microscope, slides, coverslips, some kind of really small vial, a small bottle of saturated saltwater, a Q-Tip (toothpick, wooden matchstick, whatever) and a pretty good sized eye-dropper.
Some of this stuff could use some explanation:
MICROSCOPE: A good lab-quality microscope is NOT going to come cheap (not easily, anyway). I got a 30 year-old scope for US $275 that only has three objectives but is binocular (two eyepieces) and that was actually a pretty good deal. You don’t need a binocular scope but they sure are easier on the eyes (unless you only have one) if you’re going to spend hours doing it. It’s when you spend a LONG time examining things because you don’t know what they are that you REALLY start getting eyestrain.
I did look through a kid’s microscope to see if I could see the coccidia oocysts through it and I could. They weren’t as sharp, but you CAN identify them. Remember, it’s a tool—you’re trying to save the life of a pigeon so if it’s all you can afford and it works… it’s good enough. Now, a cat, of course, would rather die than be diagnosed with inferior equipment so don’t bother. (Oh, come on! I was just joking! Don’t call the SPCA!!! I’m making out a check right now…)
COVERSLIPS: The little squares of flat glass or plastic that are used to cover the samples on some slide preparations. They come in different sizes as well as different thicknesses. A “No. 0” size is generally used if you’re going to be using the 1000x oil immersion combination (10x eyepiece X 100x objective lens) because a No. 1 size is thick enough that the lens might adjust right down on it and break it as well as do possible harm to the microscope’s adjustment gears (depends on the scope).
If you don’t have coverslips for this test, then you’re going to have to check to see that your microscope focuses with enough clearance above a two-slide stack in the 100x configuration. That is, you’re going to use either a full slide or a broken piece of a slide (disclaimer: author not FINANCIALLY responsible for anyone cutting themselves with a broken slide) and put a hair in between the slides. Put the stack in the microscope with the lens adjusted up out of the way, center the hair where it should be visible through the smallest magnification lens and then begin to focus carefully until you can see it plainly. If your smallest lens is a 4x objective, then rotate the 10x objective into place and make sure it doesn’t hit the doubled slide. Refocus carefully. If that won’t work, get some real coverslips for this online through a scientific supply retailer or at an educational/scientific/laboratory store in a location near you.
VIAL: Think of a vial as a real small test tube. The vials that I use are from a commercial lab supply but you don’t need anything that difficult to come by. It’s best if they’re pretty small—mine are glass and hold slightly less than one teaspoon. They’re about 3/8” in diameter, 1-1/4” tall and flat bottomed. Another thing that could work is one of those plastic boutonniere water-holding thingies. I think they come on corsages as well. Everybody has one of those laying around, right? If you can’t find anything in the house that’ll work, you’re going to have to search the drugstore until you find something that will. I just tried looking through the house for a suitable replacement and the only thing that I came up with was half of a ballpoint pen or pen cap. You can’t see through them, but they’d work in a pinch. If it’s a tapered pen half with a hole in the bottom for the point to stick through, you’re going to need to make a base and seal the hole. I’d use fresh-chewed gum stuck to the tapered end with a piece of paper on bottom to keep it from sticking to anything else.
Uh… the idea here is to get achievable results RIGHT NOW instead of languishing in the throes of defeat because you’ve got to go shopping in some other city or online and wait for days, weeks or months for results. That’s why you CAN substitute for decent equipment here. After all, you’re looking at poop, not performing rocket science. The rocket scientists made the microscope and you’ve ALREADY bought that.
This test is called a “float.” They call it that because you’re going to put a fecal sample in some saltwater and float the parasites to the top. They float for the same reason you would in the Great Salt Lake in Utah—you’re lighter than the water. Worm eggs, coccidia oocysts and some other things tend to float right out of the poop when the saltwater solution is “saturated.” Pictures illustrating this procedure (verbally detailed below) may be accessed at this link:
http://community.webshots.com/album/390838288PpihBy
Step 1—prepare your saltwater. Use a small, clean (clear is best) bottle (don’t make a big batch—1/4 cup is more than enough) and fill half-full (half-empty if you’re a pessimist) with water. Start adding regular table salt by the teaspoon and shaking each time you add until you finally get to where the salt stops dissolving in the water. Add water slowly if you’ve way oversalted until most of it can dissolve when shaken.
Step 2—Grab a sample of the solids (sometimes, it’s hard to find solids in a REAL sick pigeon’s poop—just do your best). Often, the pigeon hasn’t had anything to eat before you got it and all that’s coming out the vent is water, acid and dark green bile. Either you’re going to have to stuff some food down the pigeon to get a sample (which is going to take awhile), or you’re going to have to use these liquids for your sample. Or both.
Step 3—Load the poop in the vial. You’d like to get the vial about half full (it takes a REAL pessimist to call half of a vial of poop “half empty”) or less of solid poop. Actually, you can do the test with a very minimal sample. Both worm eggs and coccidial oocysts will float up if they're present in the feces. Sometimes, there is mostly water and very little solids and you just have to scoop up what you can.
Step 4--Fill it part way with the saltwater using the eyedropper (spoon, whatever works). Use a Q-tip (fresh match, toothpick, whatever--just be sure it's clean) to reach in and mix the poop and saltwater thoroughly. Add saltwater until not quite full with your mixing instrument as far in it as you’re going to put it.
Step 5—Carefully place the vial straight upright on something out of the way and drop enough drops of the saltwater to top off the vial until the liquid beads up slightly out of the top.
Step 6—Center a coverslip (slide, shard) on top of the bead of liquid and leave it lay for about 30 minutes.
Step 7—Pick the coverslip (slide, shard) off carefully and lay it on the center of a clean slide.
Step 8—Examine the slide at 100x for parasites. That’s using the 10x eyepiece (if that’s what you have) with a 10x objective (the part that’s almost right down on the slide).
Step 9—Know both what you’re looking at and what you’re looking for! Usually, most of the solids sink to the bottom but you’re likely to see a few plant cell parts from the food the donor has eaten. Bubbles will look funny, like little black, shiny globes. There can be a million kinds of things—feather parts, fibers from a Q-Tip, dust, lint, litter from Piccadilly Circus (had to throw that one in for Cynthia!) but hopefully no OOCYSTS OR WORM EGGS!!!
Of course, since you’ve come this far, it would be a shame not to find a parasite egg, wouldn’t it?
SHAME ON YOU!!! THIS PIGEON WASN’T HATCHED TO SUFFER DISEASES FOR YOUR ENTERTAINMENT!!!
Still, you hate to spend all that money for this equipment and time to learn to use it and have nothing to show for it.
Okay, so now we have to go shopping for microscope images of what you're looking for. Here's one that shows close-ups of the single oocysts. When you're looking with 100x magnification, they're going to be a lot smaller than this. I'll try to find a more realistic picture link and post it in a follow-up:
http://pets.webshots.com/photo/1390863736073664377NBbQUV
Here is a link to pictures taken of a typical Coccidiosis fecal sample before processing and through the microscope:
http://community.webshots.com/album/388039642jvhcQW
Here's a link to Vonda's page covering similar material:
http://www.finchaviary.com/Maintenance/FecalSmear.htm
")